Astrophotography Techniques: Astrophotography transforms the stunning and complex visuals of the night sky into a form that can be shared and appreciated by all. From the faint glow of distant galaxies to the vibrant bands of the Milky Way, capturing the cosmos requires not just a camera but also an understanding of the celestial dance. It is a journey that combines patience, precision, and a touch of creativity to freeze a moment of the infinite universe.

The practice of astrophotography can be both a technical and artistic endeavor. Choosing the right equipment is a foundational step, from selecting a capable camera to adding a suitable lens and tripod for stability. Mastering camera settings, like the balance of ISO, aperture, and shutter speed, is key to successful captures under various night sky conditions. With the stage set, photographers must then carefully plan and compose their shots, accounting for factors such as light pollution and the movement of celestial bodies.

The pursuit of astrophotography requires specific equipment engineered to capture the faint light of distant stars, galaxies, and other celestial objects. From the heart of the system—the camera—to the supportive accessories, each piece plays a pivotal role in the imaging process.
Astrophotography enthusiasts should prioritize a camera capable of high sensitivity and long exposure times. A DSLR or mirrorless camera with a manual mode allows for more control over exposure settings. For capturing wide star fields, wide-angle lenses are ideal, while for deep-sky objects, a telephoto lens offers greater magnification. Telescopes can also be used with a suitable camera adapter to act as a long, powerful lens.
Stability is crucial, making a sturdy tripod a must-have to prevent camera shake and ensure sharp images. Advanced nighttime shoots benefit from a motorized star tracker or equatorial mount, which compensate for Earth’s rotation and keep the camera aligned with the celestial object. The use of a remote shutter release can also help reduce vibrations when taking long-exposure photos.
Filters enhance astrophotography outcomes by mitigating unwanted wavelengths of light. Light pollution filters are particularly valuable as they reduce the glow of artificial light, allowing celestial objects to stand out. For more specialized photography, such as capturing specific features of planets or nebulae, narrowband and other astronomical filters can be attached to DSLR cameras or telescopes to isolate certain wavelengths of light.
Mastering the correct camera settings is the cornerstone to successful astrophotography. Sharp images of celestial bodies require precise adjustments to ISO, aperture, and shutter speed, alongside techniques to maintain focus and stability.
Exposure is determined by three main factors: ISO, aperture, and shutter speed.
ISO refers to the camera’s sensitivity to light. For astrophotography, one typically starts with an ISO ranging from 800 to 6400, adjusting to ensure stars are visible without introducing excessive noise.
Aperture, the size of the lens opening, is expressed by f-numbers. A lower f-number (e.g., f/2.8) means a wider aperture, allowing more light—ideal for low-light conditions in astrophotography.
Shutter Speed governs how long the camera’s sensor is exposed to light. Longer shutter speeds capture more light, essential for photographing dimly lit subjects like stars and galaxies. However, due to the Earth’s rotation, shutter speeds should be limited to avoid star trails unless that is the desired effect.
| Settings | Description |
|---|---|
| ISO | Start from 800 to 6400, adjust accordingly. |
| Aperture | Use wider apertures, like f/2.8 or f/4. |
| Shutter Speed | Balance between sufficient exposure and minimizing star trails. |
Achieving sharp focus is critical in astrophotography to capture the fine details of the stars. Autofocus is usually ineffective in dark conditions, so manual focus is recommended. Using a bright star or distant light on the horizon can help to attain a precise focus. Once the focus is achieved, it is often beneficial to switch to manual mode to ensure the focus doesn’t change during the exposure.
Live View Mode aids in focusing and composing shots without looking through the viewfinder. It can be especially helpful for manual focusing by zooming in on a star within the camera’s live view screen.
Remote Shutter Releases prevent camera shake, a common issue when pressing the camera’s shutter button by hand. These devices allow photographers to take pictures without physically touching the camera, maintaining image sharpness.
When capturing the night sky, the power of a photograph often lies in the artistic arrangement of celestial objects within the frame and the meticulous preparation that precedes the click of the shutter.
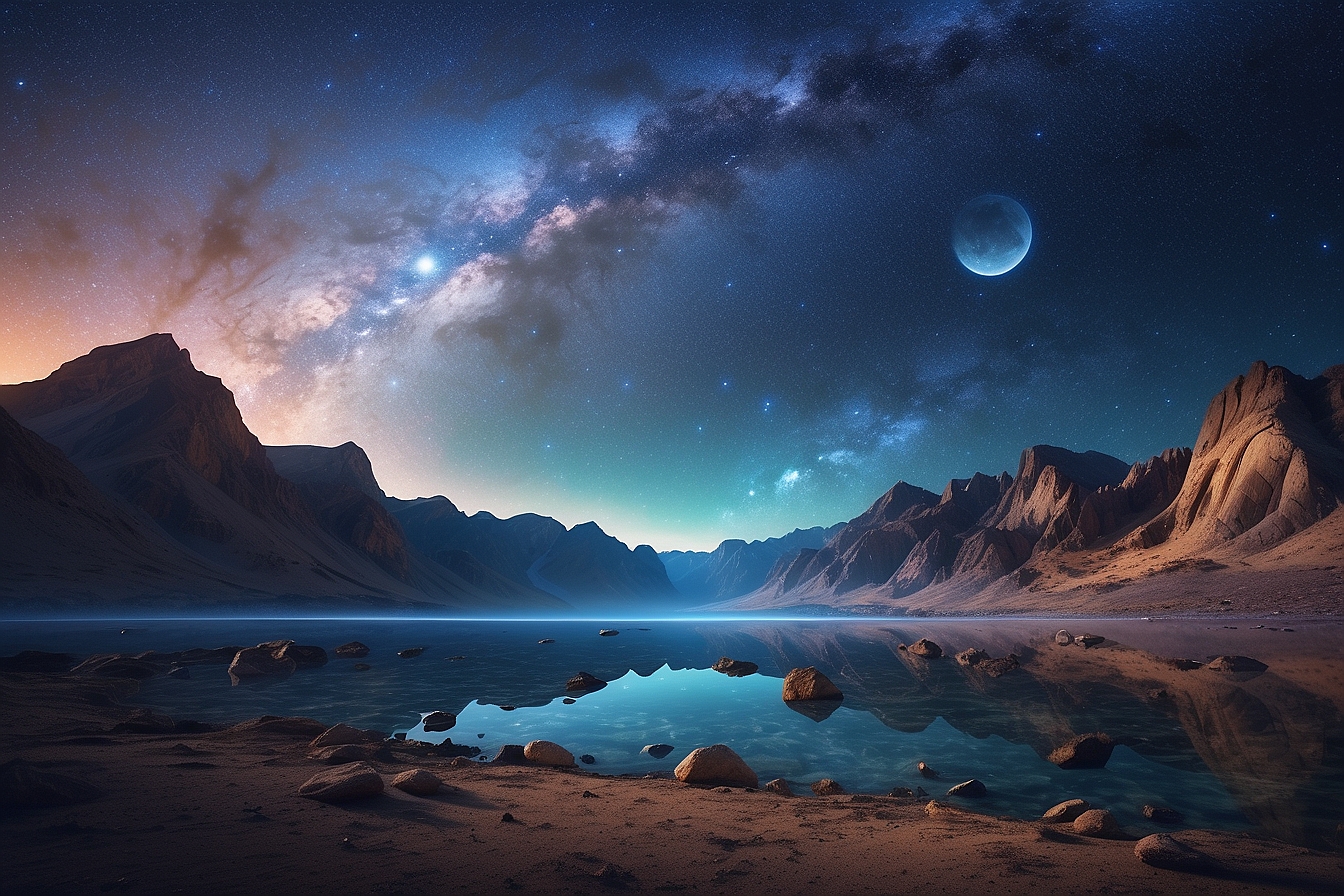
Landscape elements can ground astrophotography compositions, providing a sense of scale and context for the vastness above. By aligning a striking terrestrial feature with an astronomical phenomenon, photographers create a harmonious blend of earth and cosmos. For example, positioning a rocky outcrop as a leading line toward the arc of the Milky Way instills depth and directs the viewer’s eye through the scene.
When centering on celestial objects, one must consider the rule of thirds to balance the composition. Isolating a particular planet, constellation, or even a section of the Milky Way can heighten the impact of the photo. For instance, the placement of Jupiter or Saturn—mesmerizing subjects within our solar system—near one of the intersections of the rule of thirds can provide a captivating focal point against the backdrop of the night sky.
Astronomy apps and resources are invaluable tools for planning a successful astrophotography shoot. They assist in predicting celestial alignment and identifying the prime time for capturing specific astronomical events. With a resource like an astronomy app, photographers can pinpoint the optimal night when the alignment of the Milky Way will complement their chosen landscapes, maximizing the exploration of the night sky within their imagery.
Achieving striking astrophotography requires specific techniques tailored to various celestial subjects. Whether capturing the crisp details of the moon and planets, the vastness of deep-sky objects, or the swirling dance of star trails, photographers must adjust their approach for each target.
The moon and planets present distinct photographic opportunities within our solar system. To photograph the moon, one needs a telephoto lens or telescope, a camera capable of manual mode, and clear atmospheric conditions. Settings should include a fast shutter speed to prevent overexposure and capture detail. For planets, similar equipment is required, but with larger focal lengths to make these distant objects prominent in the frame. Techniques like planetary stacking can increase the clarity and detail of the final image.
Photographing deep-sky objects like galaxies and nebulae requires a telescope equipped with a tracking mount to compensate for Earth’s rotation. This is crucial to prevent star trailing during the long exposures needed to capture these faint subjects. A camera with high sensitivity (ISO) and a fast, wide-aperture lens are pivotal. Techniques such as long-exposure imaging and image stacking become essential when targeting the Andromeda Galaxy or the intricate details within nebulae. This brings out the colors and structures otherwise invisible to the naked eye.
Star trails depict the apparent motion of stars across the sky and require long exposure times, often multiple hours. A sturdy tripod and an intervalometer to automate the shooting process are practical tools for this technique. Alternatively, for capturing the Milky Way, one must find a dark location and use wide-angle lenses to encompass the sprawling arm of our galaxy. With proper tracking, it’s possible to get clear shots of the Milky Way’s core, revealing its bright clusters and dark rifts.
Light pollution has become a significant barrier to clear night sky observations. This section outlines practical steps for photographers to capture stellar images by seeking out areas with minimal light interference and using specialized equipment to counteract urban glow.
One of the first steps in astrophotography is locating areas with dark skies. Urban environments often suffer from excessive artificial lighting, so enthusiasts may need to seek more remote locations for clearer views of the cosmos. Spaces identified as “Dark Sky Reserves” or “Dark Sky Parks” are ideal, as they’re recognized for their minimal light pollution and commitment to preserving the night sky.
Astrophotographers can leverage technology and equipment to mitigate light pollution. Light pollution maps offer valuable insights into the brightness levels of different regions, helping photographers plan their shoots. To directly tackle the issue of light pollution in images, one can employ light pollution filters. These filters are designed to block out wavelengths of common artificial lights, thereby enhancing the contrast of celestial objects against the night sky.
In the quest for breathtaking images of the night sky, astrophotographers must be adept in the art of post-processing. This phase is as vital as the actual capturing of the stars and planets, translating raw data into awe-inspiring visuals.
The journey to a striking astrophotograph begins with basic image processing. This involves correcting for the camera’s sensor anomalies by adjusting the exposure, contrast, and white balance. Utilizing tools like Adobe Photoshop, photographers can enhance the clarity and color balance of their images. Processing in RAW format allows for a greater degree of manipulation without loss of quality, enabling photographers to fine-tune their work to perfection.
For those seeking to delve deeper, advanced techniques such as image stacking enhance the final image quality markedly. By overlaying multiple shots of the same scene, photographers reduce noise and bring forth detail that single exposures cannot capture. Noise reduction algorithms can further clean up the image, resulting in a more polished, professional-looking photograph. Expert use of software like PixInsight is often required to skillfully manage these processes.
Effective post-processing relies heavily on the software used. Adobe Photoshop is the Swiss Army knife of image editing, with a vast array of tools for both basic adjustments and intricate layer work. For those immersed in astrophotography, PixInsight specializes in astronomical image processing, offering sophisticated functions like calibration, normalized scale gradients, and integrated deconvolution for crisp, detailed celestial captures. Whether it’s refining the colors of a nebula or extracting the faintest light from distant galaxies, these tools are indispensable for the modern astrophotographer.
Embarking on the journey to become an accomplished astrophotographer involves a dedication to practice and a commitment to continuous learning. Here are key strategies to facilitate growth in this challenging yet rewarding field.
To improve as an astrophotographer, one must embrace both practice and patience. Mastery of capturing celestial bodies requires numerous attempts and could mean spending many hours under the night sky. An astrophotographer often starts with simpler equipment and gradually moves to more complex setups as their skills develop. Each session is a learning opportunity, and over time, proficiency grows with every shot taken.
The astrophotography community is a valuable resource for an emerging astrophotographer. Online forums and social media groups offer spaces to connect with fellow enthusiasts and experts. Engaging with this community can provide insights into new techniques, equipment reviews, and troubleshooting advice. Whether through an online forum or attending star parties, learning from others’ experiences plays a crucial role in advancing one’s own skill set.
Sharing your work plays a crucial part in professional growth. It invites both critique and praise, helping an astrophotographer to see their work through the eyes of others. Sites dedicated to astrophotography are excellent platforms for exhibiting images and receiving feedback. This practice not only helps hone technical skill but also fuels creative inspiration, pushing an astrophotographer to capture even more compelling images of the cosmos.
In this section, you’ll find detailed answers to some of the most common inquiries about astrophotography, providing both beginners and experienced photographers with the necessary information to capture the night sky effectively.
Optimal camera exposure settings for night sky photography typically include a wide aperture (f/2.8 – f/4), a high ISO setting (800-3200), and a long shutter speed (15-30 seconds), but may vary depending on the camera’s capabilities and the darkness of the sky.
For beginners, wide-angle lenses with a large aperture, such as 14-24mm f/2.8, are recommended because they capture a broad area of the sky and allow more light to reach the camera sensor.
Noise in long exposure astrophotos can be reduced by using a lower ISO setting, enabling long exposure noise reduction features in the camera, and employing post-processing techniques such as stacking multiple images.
Essential equipment for amateur astrophotographers includes a sturdy tripod, a DSLR or mirrorless camera capable of manual mode, a wide-aperture lens, and a remote shutter release to prevent camera shake during long exposures.
Achieving clear focus on stars can be accomplished by using the camera’s manual focus mode, magnifying the live view on a bright star, and adjusting the focus until the stars appear as small points of light.
To capture the Milky Way, photographers should find a dark location away from light pollution, use a wide-angle lens with a large aperture, compose the photograph with interesting foreground elements, and experiment with exposure settings to avoid star trails and capture the most detail.